Are you diving into the fascinating world of electronics and wondering how to tackle desoldering? Fear not! In this step-by-step guide, we will demystify the process and show you how to use solder wick effectively. Whether you’re a seasoned enthusiast or a beginner, mastering this skill is crucial for any electronic project.
Understanding Solder Wick
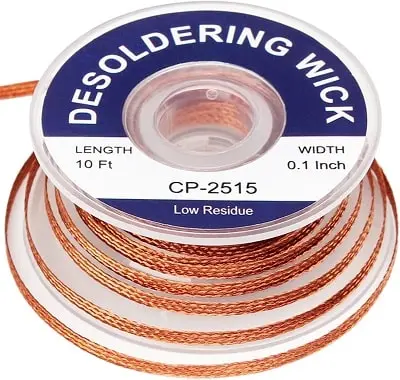
Before we delve into the steps, let’s understand what solder wick is. Also known as a desoldering braid, it is a finely braided copper wire coated with flux. This combination allows it to absorb and remove excess solder when heated. Think of it as a superhero for correcting soldering mistakes or salvaging components from old circuit boards.
Step 1: Gather Your Tools
To begin your desoldering journey, assemble the necessary tools. You’ll need a soldering iron, solder wick, tweezers, and safety equipment like goggles. Ensure your workspace is well-lit and ventilated for a comfortable and safe experience.
Step 2: Prep the Soldering Iron
Power up your soldering iron and let it reach the appropriate temperature. A temperature between 350°C to 400°C (662°F to 752°F) is generally suitable for most soldering tasks. Once heated, carefully clean the soldering iron tip with a damp sponge to ensure optimal performance.
- Crane Electrical Systems: Safe, Intelligent, and Efficient Operation
- Electrical Installation Guide: Wiring, Protection & Safety Standards
Step 3: Identify the Connection Points
Examine the electronic component you wish to desolder. Identify the connection points where the solder needs to be removed. This careful assessment will guide you in placing the solder wick effectively, ensuring precision and minimizing the risk of damaging the circuit board or component.
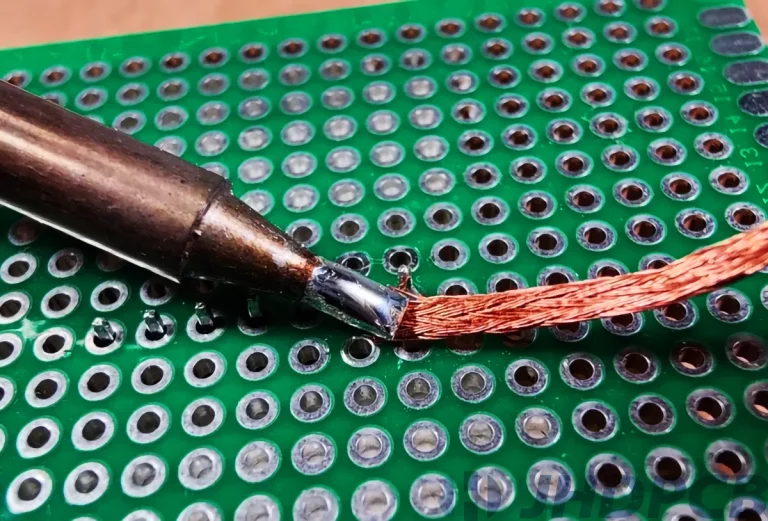
Step 4: Position the Solder Wick
Place the solder wick over the solder joint you want to remove. Ensure it covers the entire area, maximizing contact with the solder. Hold the solder wick in place with one hand while gently pressing the soldering iron tip on top of it with the other.

Step 5: Heat and Wick Away
With the soldering iron in one hand and the solder wick in the other, apply heat to the solder joint. The heat will cause the solder to melt, and the wick, infused with flux, will draw it in like a magnet. Move the soldering iron and wick together, maintaining contact until the solder is fully absorbed.
- Charging EV: A Beginner’s Guide to Electric Vehicle Ownership
- 3D Scanning in Industrial Inspection and Engineering Applications
Step 6: Clean and Repeat
Once the solder is wicked away, inspect the joint. If necessary, repeat the process until you achieve a clean and well-desoldered connection. Use tweezers to remove any remaining solder debris, ensuring a pristine surface for future soldering or component replacement.
Conclusion
Congratulations! You’ve successfully navigated the art of desoldering using solder wick. With this newfound skill, you can confidently tackle electronics projects, troubleshoot, and repair with precision. Practice makes perfect, so keep honing your desoldering expertise for seamless electronic adventures!